?unique=3140337)
Managing the opening and closing controls in Odoo 17 Point of Sale is crucial for effective cash handling. At the beginning of a shift, cashiers log in and declare the initial cash amount, setting a clear starting point for all financial transactions. Every sale, refund, and cash operation during the shift is meticulously documented, ensuring a transparent record of every transaction.
Upon completing their shift, the cashier finalizes the shift in the Odoo 17 Point of Sale application. This step ensures that the cash balance can be easily cross-checked with the physical cash on hand, as the system calculates the cash balance based on recorded transactions. By comparing the system-generated cash balance with the actual cash amount, any discrepancies or errors can be promptly identified. The robust opening and closing control functionality provided by Odoo 17 Point of Sale promotes precision, accountability, and transparency in cash handling processes. This feature empowers businesses to effectively monitor cash flow and maintain a reliable system for tracking cash transactions throughout the sales cycle.
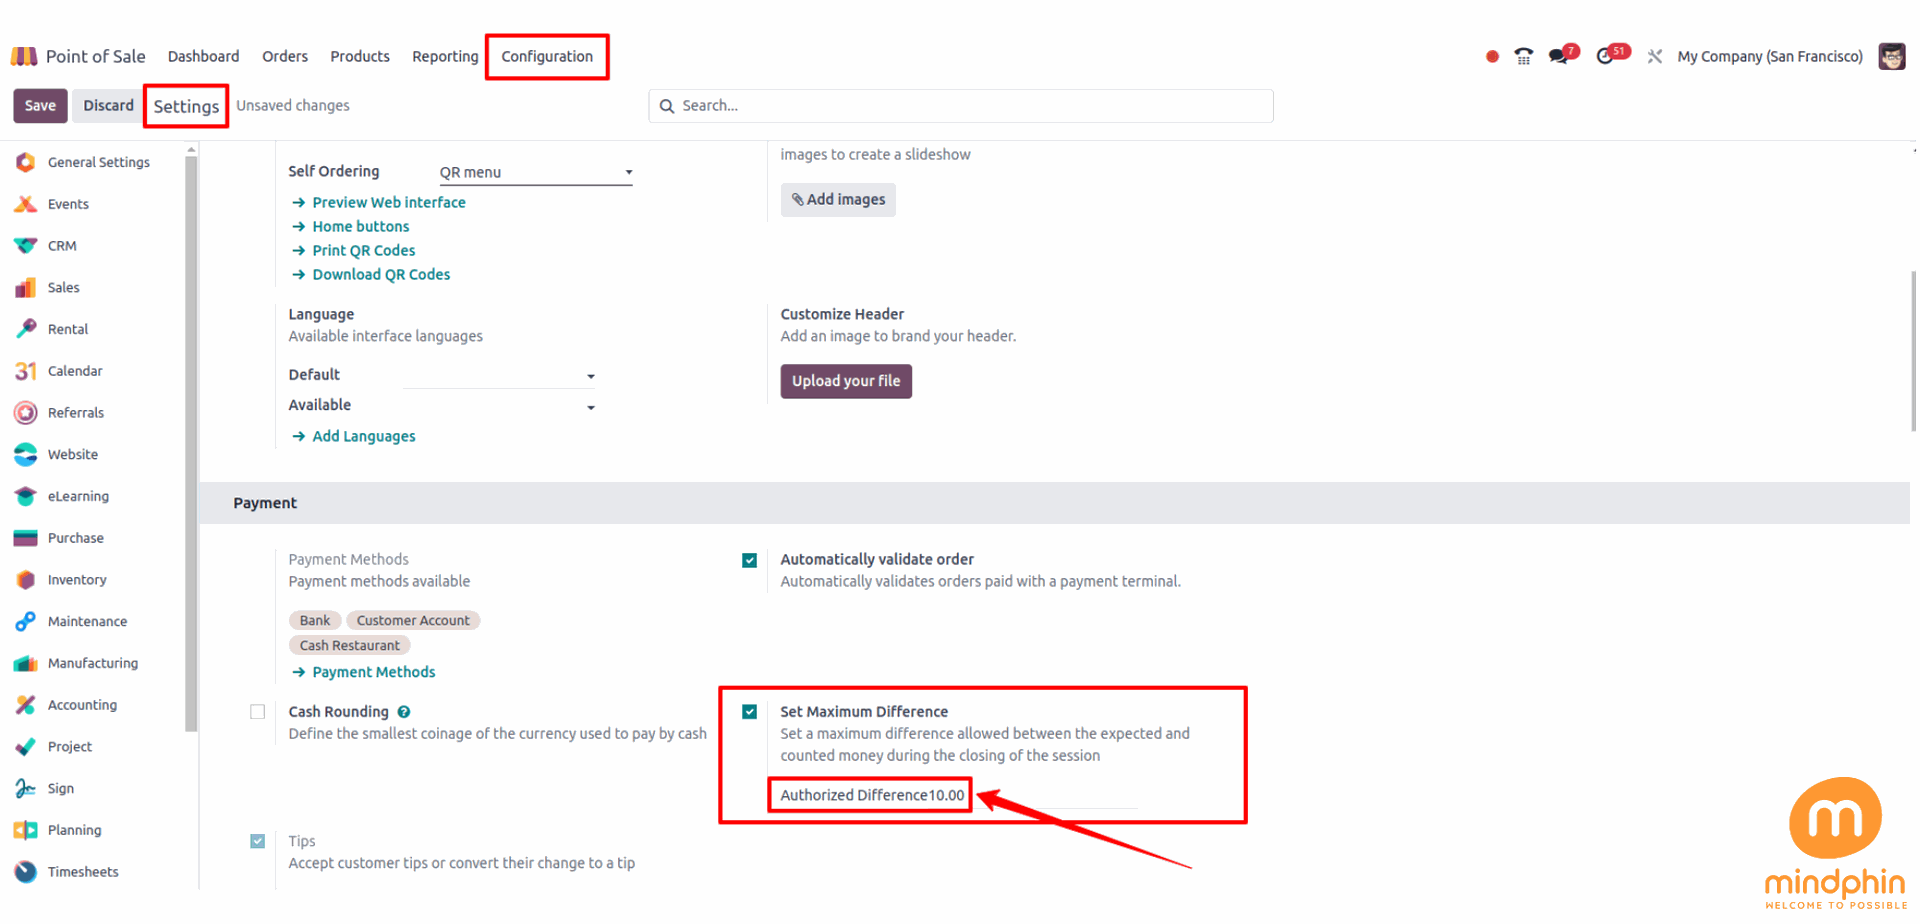
Now, let's explore the opening and closing control features of odoo 17 Point of Sale, along with its payment-related capabilities.When it comes to maintaining accuracy in cash handling, Odoo 17 Point of Sale includes a beneficial function called "maximum difference control." This tool allows companies to set a tolerance level for variations between the cash in the register at the end of a shift and the system-calculated cash balance. By establishing this maximum difference, businesses can minimize the risk of errors or discrepancies in cash management and ensure better oversight of their financial activities by quickly identifying and investigating any differences that exceed the defined threshold.
The agreed-upon difference in this case is firmly set at $10.
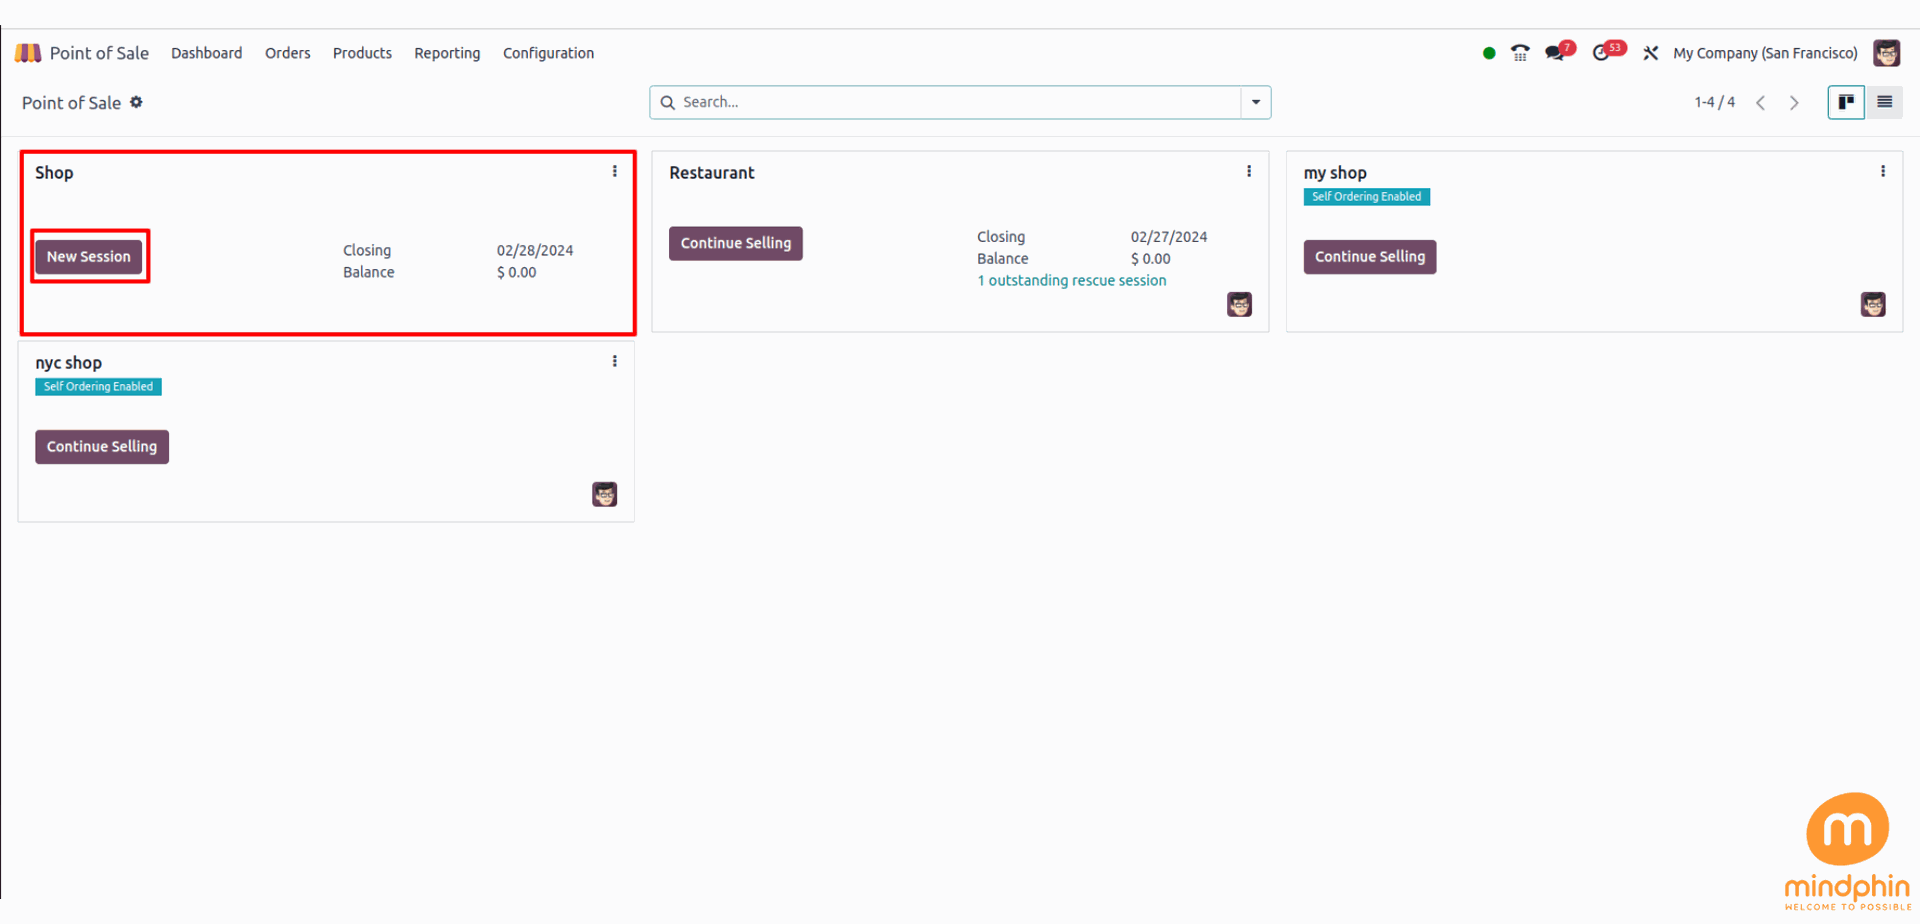
From there, you can also begin a new section. To do so, navigate to the dashboard and select the 'NEW SESSION' button.
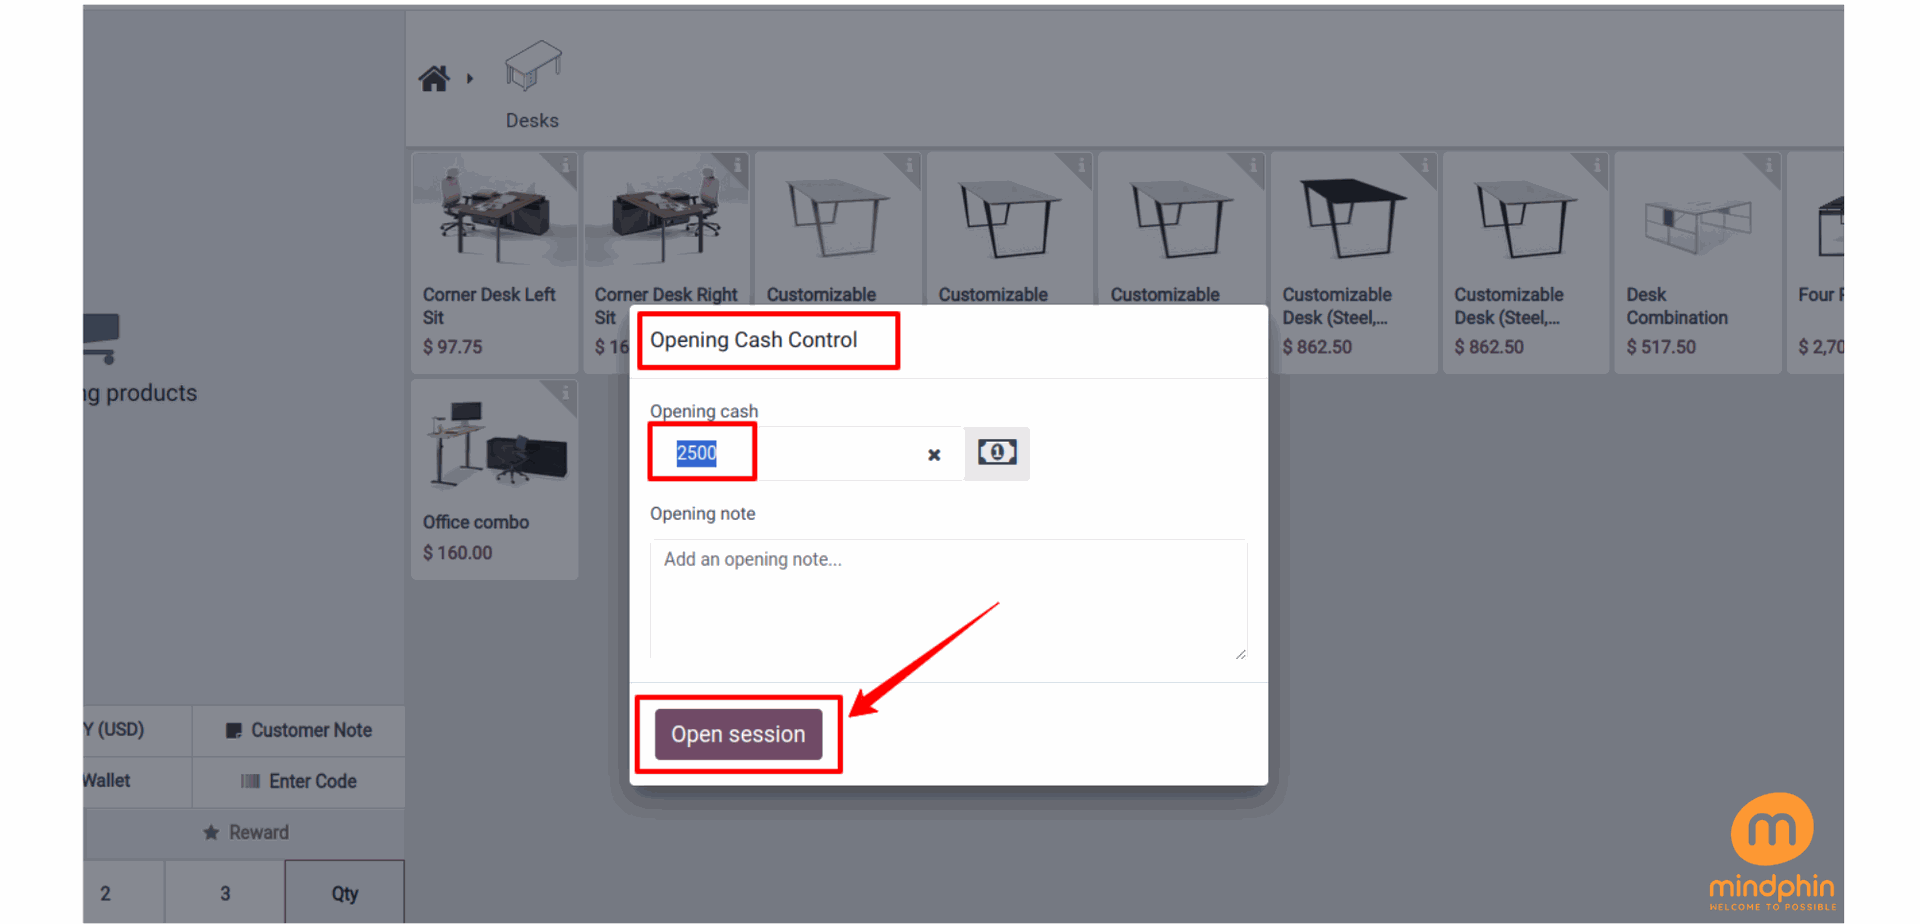
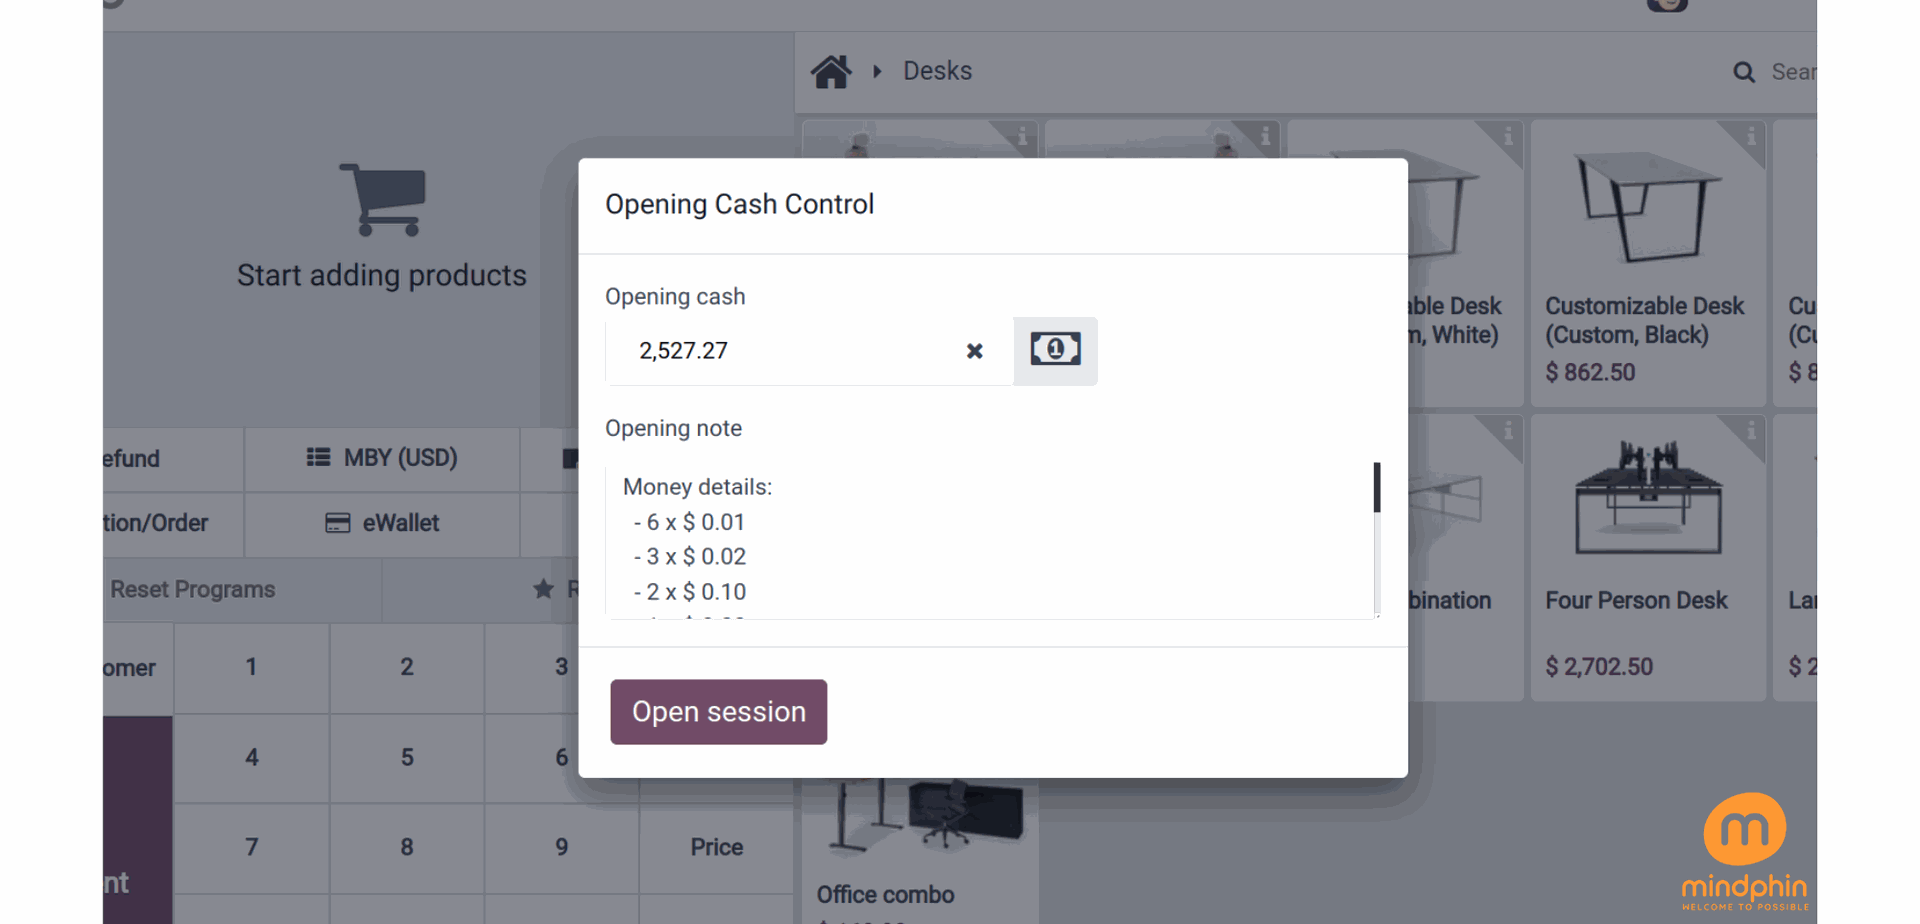
At the start of each new session, a prompt for entering an 'Opening Balance' is displayed. The initial amount of cash or funds in the register at the beginning of a business day or shift is referred to as the Opening Balance within the Odoo 17 Point of Sale module. This figure serves as the starting point for all financial transactions conducted through the Point of Sale system at that time.
Consequently, you have the ability to utilize Coins to supplement the total when establishing an opening balance. Adjustments have been made to the shop's setup settings to incorporate a range of coin options. Click on the "Small calculator symbol' to input the designated coins.
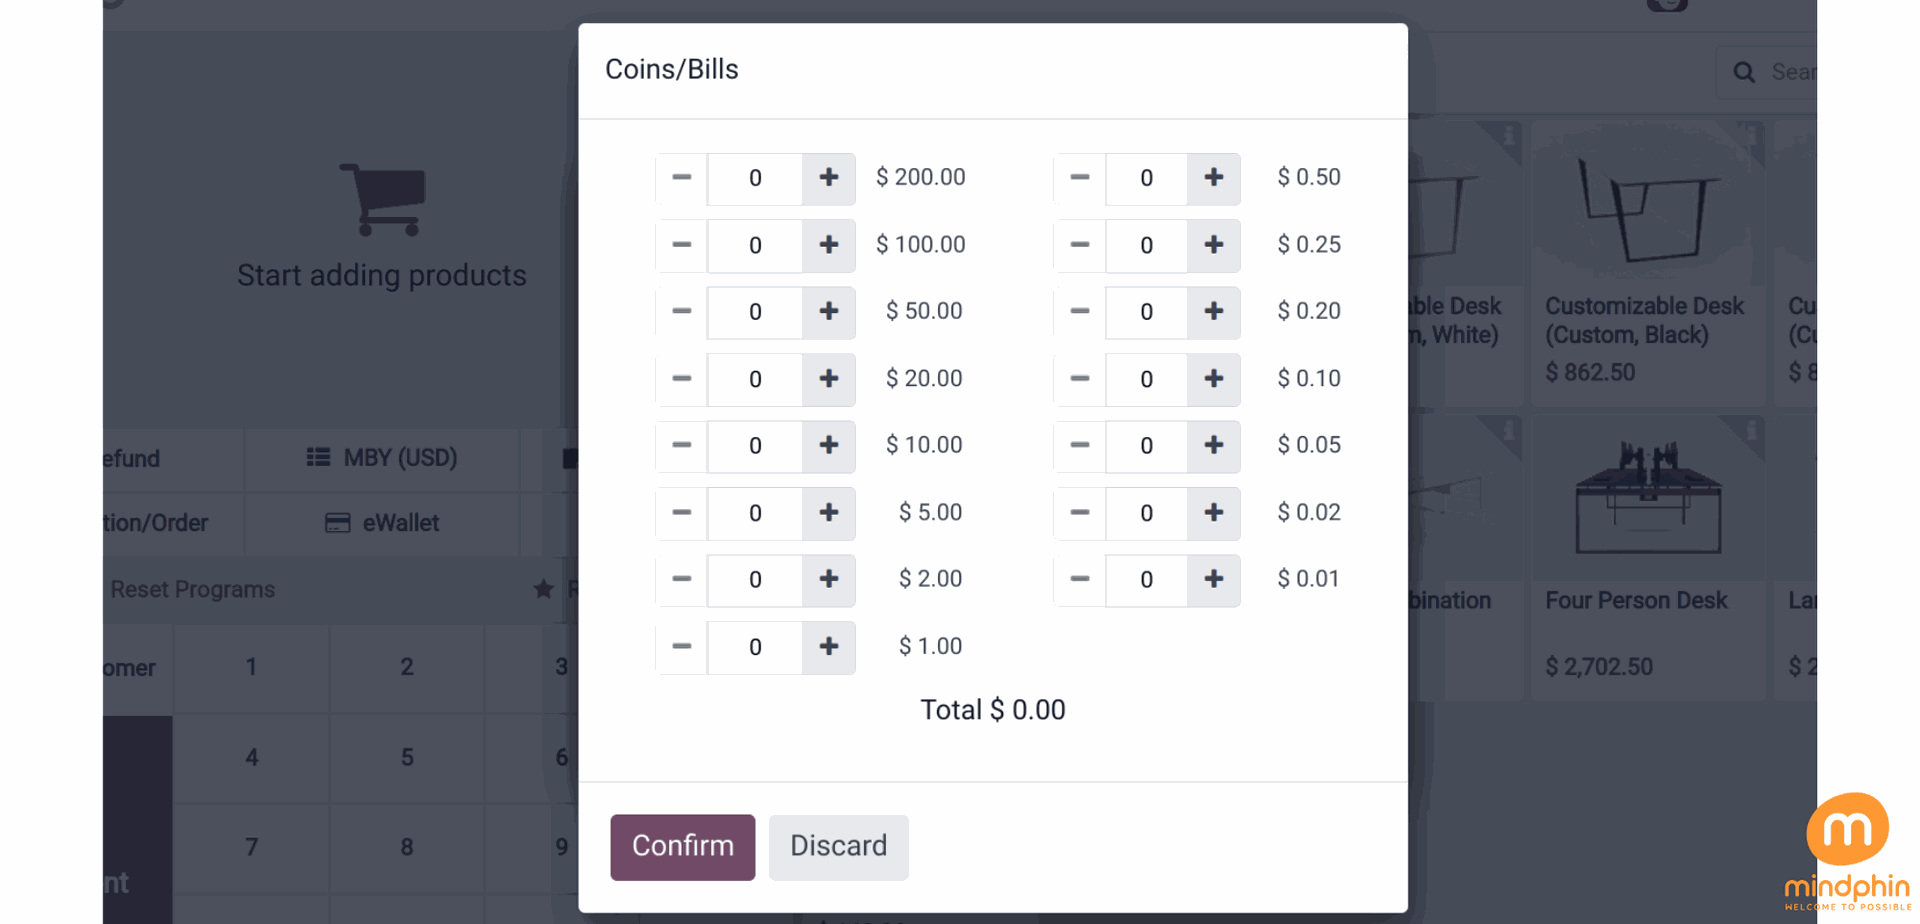
Therefore, you can use the Coins to add the amount while adding an opening balance. We changed some of the shop's setup settings to include some coins. Click the tiny calculator symbol to add the specified coins.

Subsequent to that, the financial details will be presented in the Opening Note section. By clicking on the Initiate Session button, an initial balance of $2055 can be contributed to the session.
The 'Cash in/out' functionality in Odoo 17 Point of Sale streamlines the process of tracking any additional money added to or taken out of the cash drawer during a shift. This feature provides increased flexibility in managing various cash-related tasks, such as documenting cash deposits or replenishing change, while ensuring the accuracy of financial transactions.
Employees can quickly top up their funds by using the cash in/out feature for their personal expenses. Let's take a closer look at how this can benefit them.
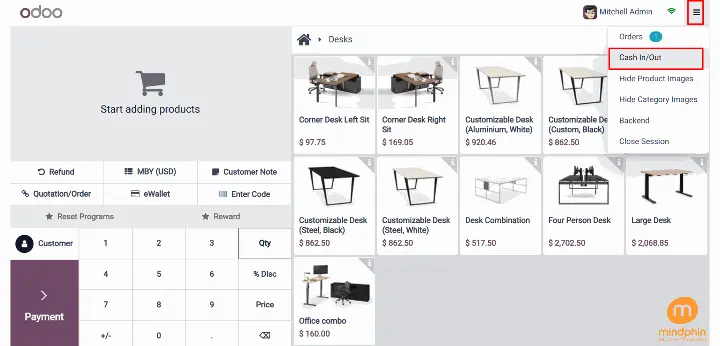
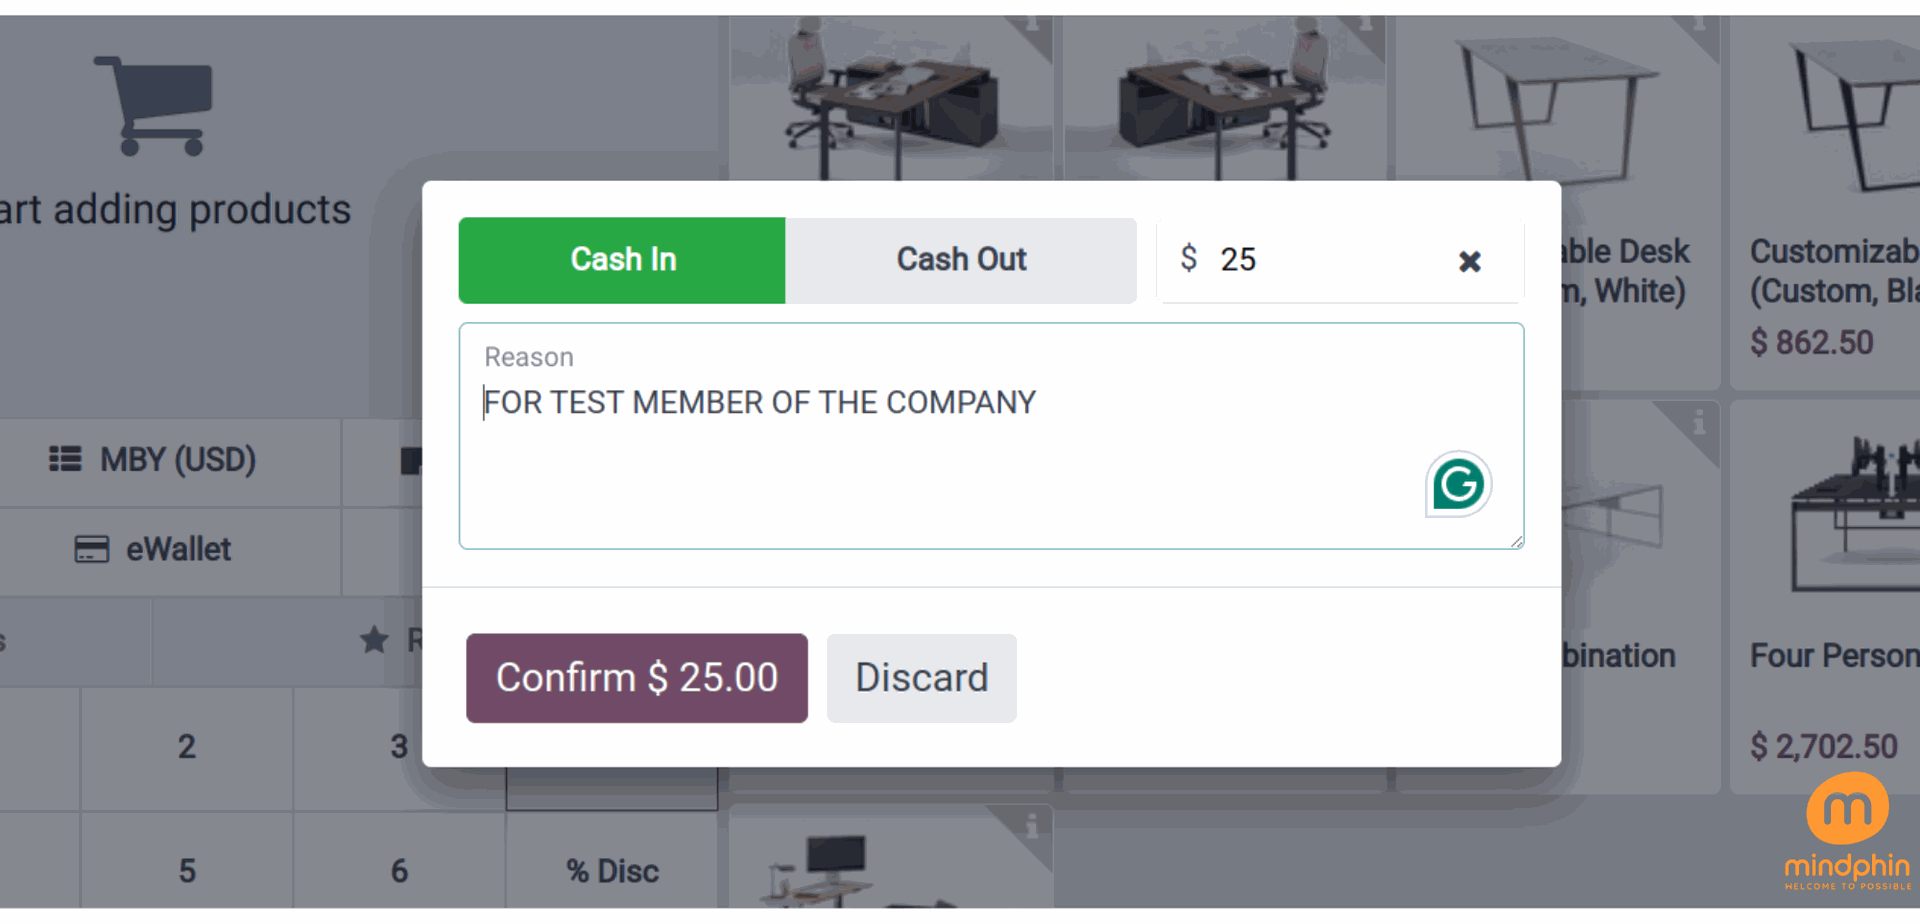
Once you click on the 'Cash In/Out' button, a new popup will appear. From there, the logged-in user can choose between Cash In or Cash Out. Feel free to provide a specific reason in the "Reason" field before clicking on the 'Confirm' button.
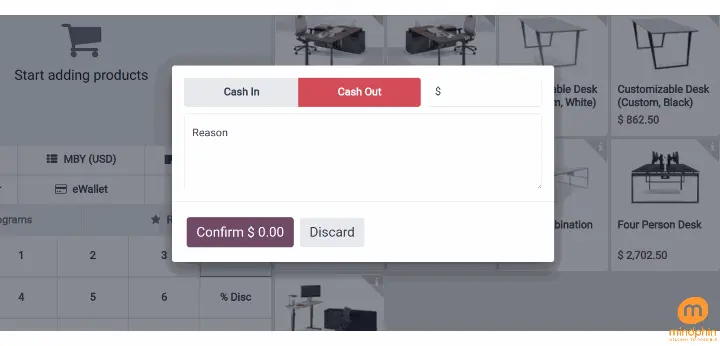
After that, Member of the company, receives $25. Then, click on the Confirm button.
Press the Cash In button when an employee needs to add cash to the drawer. The button is highlighted in green and shows the amount as a positive value.
Twenty five dollars were added by Test employee. Once done, press the Confirm button.
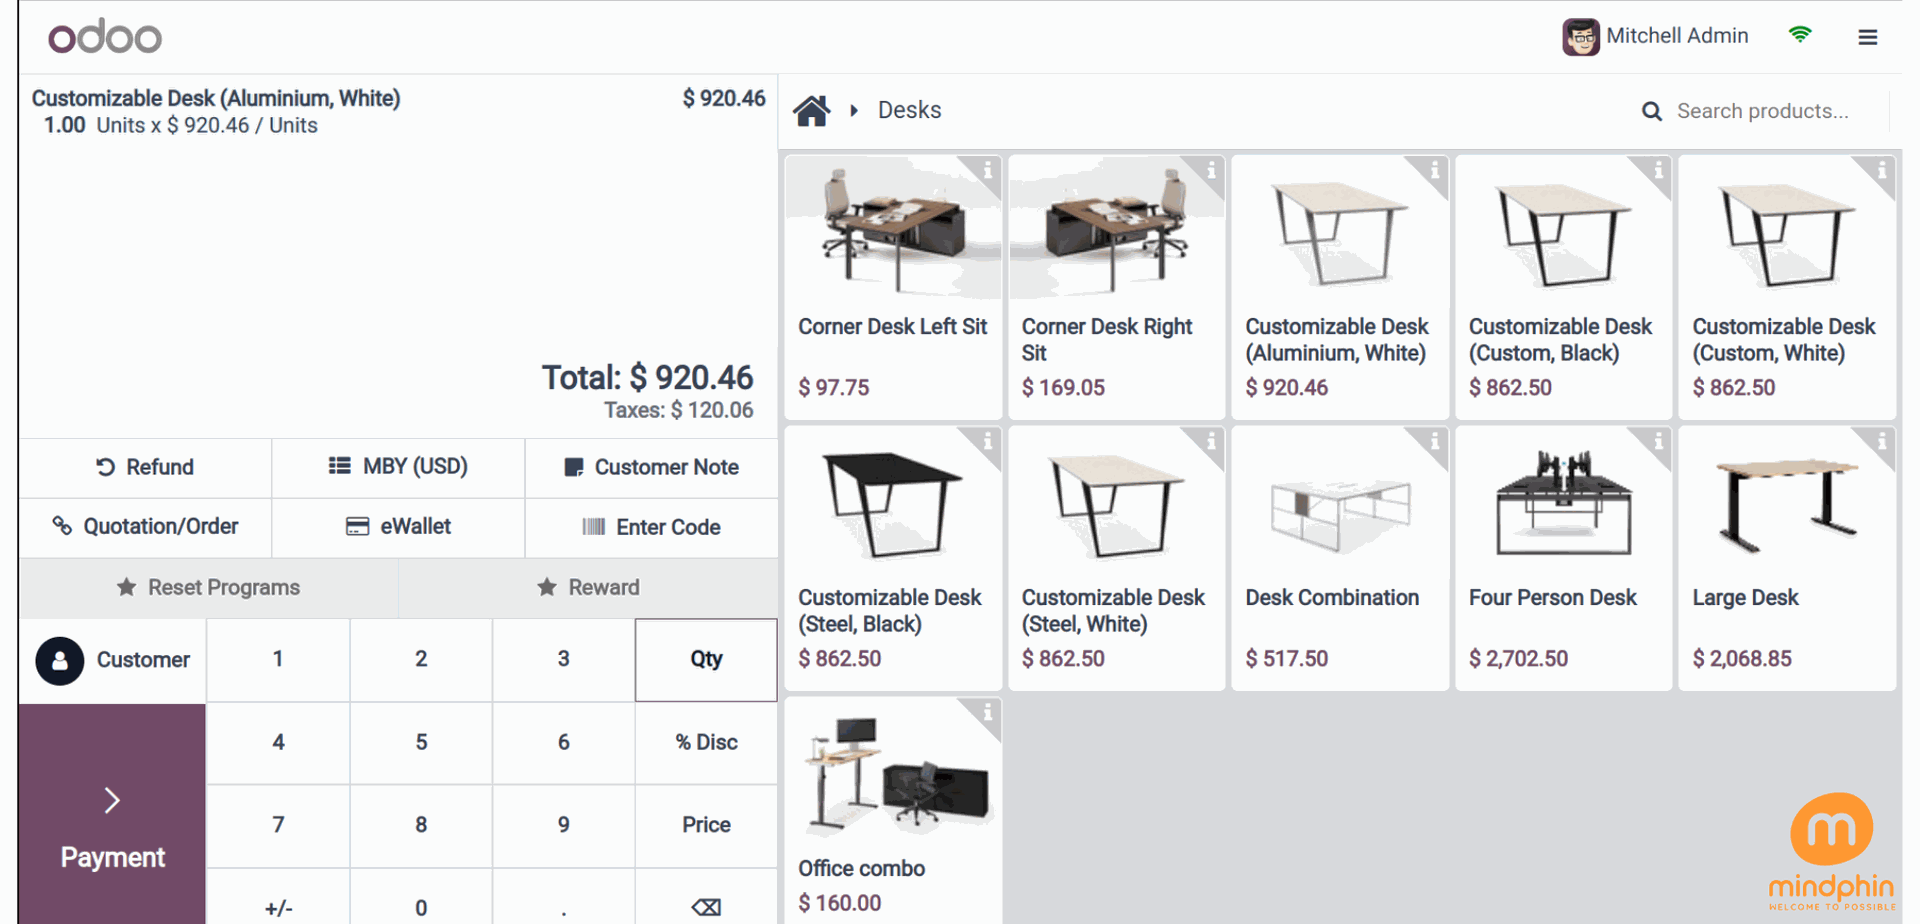
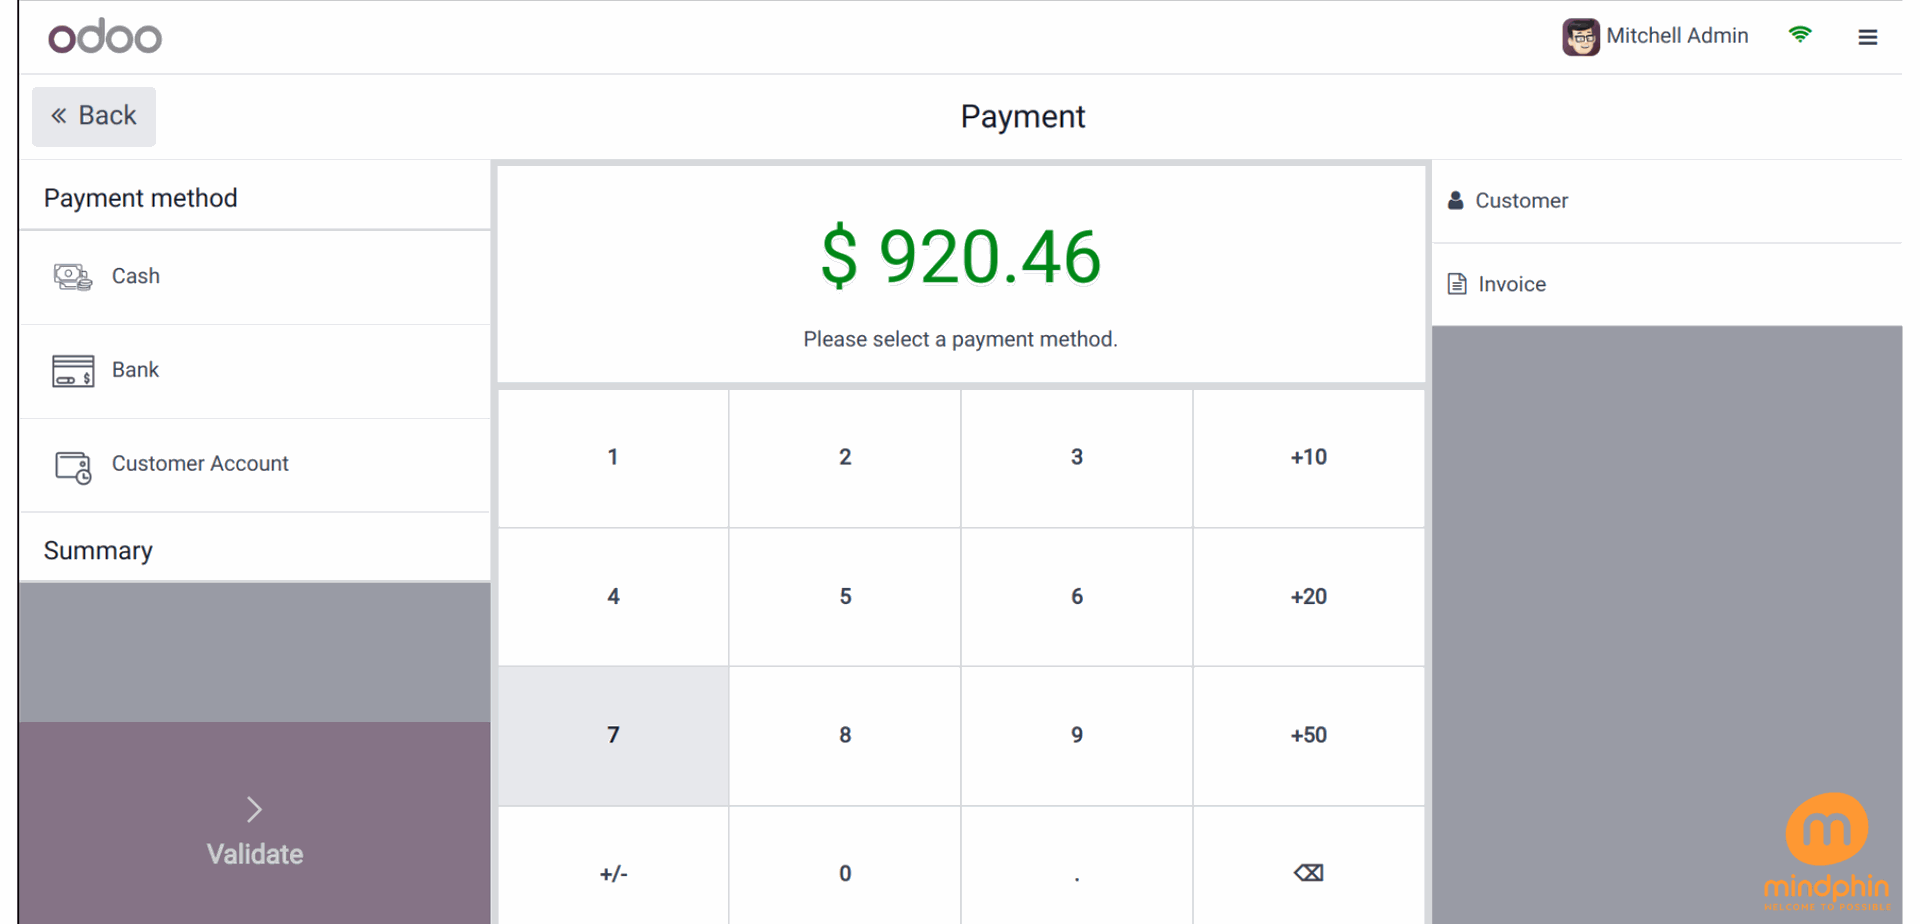
Clients have the option to choose the desired items from the store. Upon selecting the Payment button, they will be directed to the payment page, facilitating the financial transaction process for the customer.
Odoo supports four distinct payment methods: bank transfers, cash transactions, customer accounts, and payments processed through payment terminals.
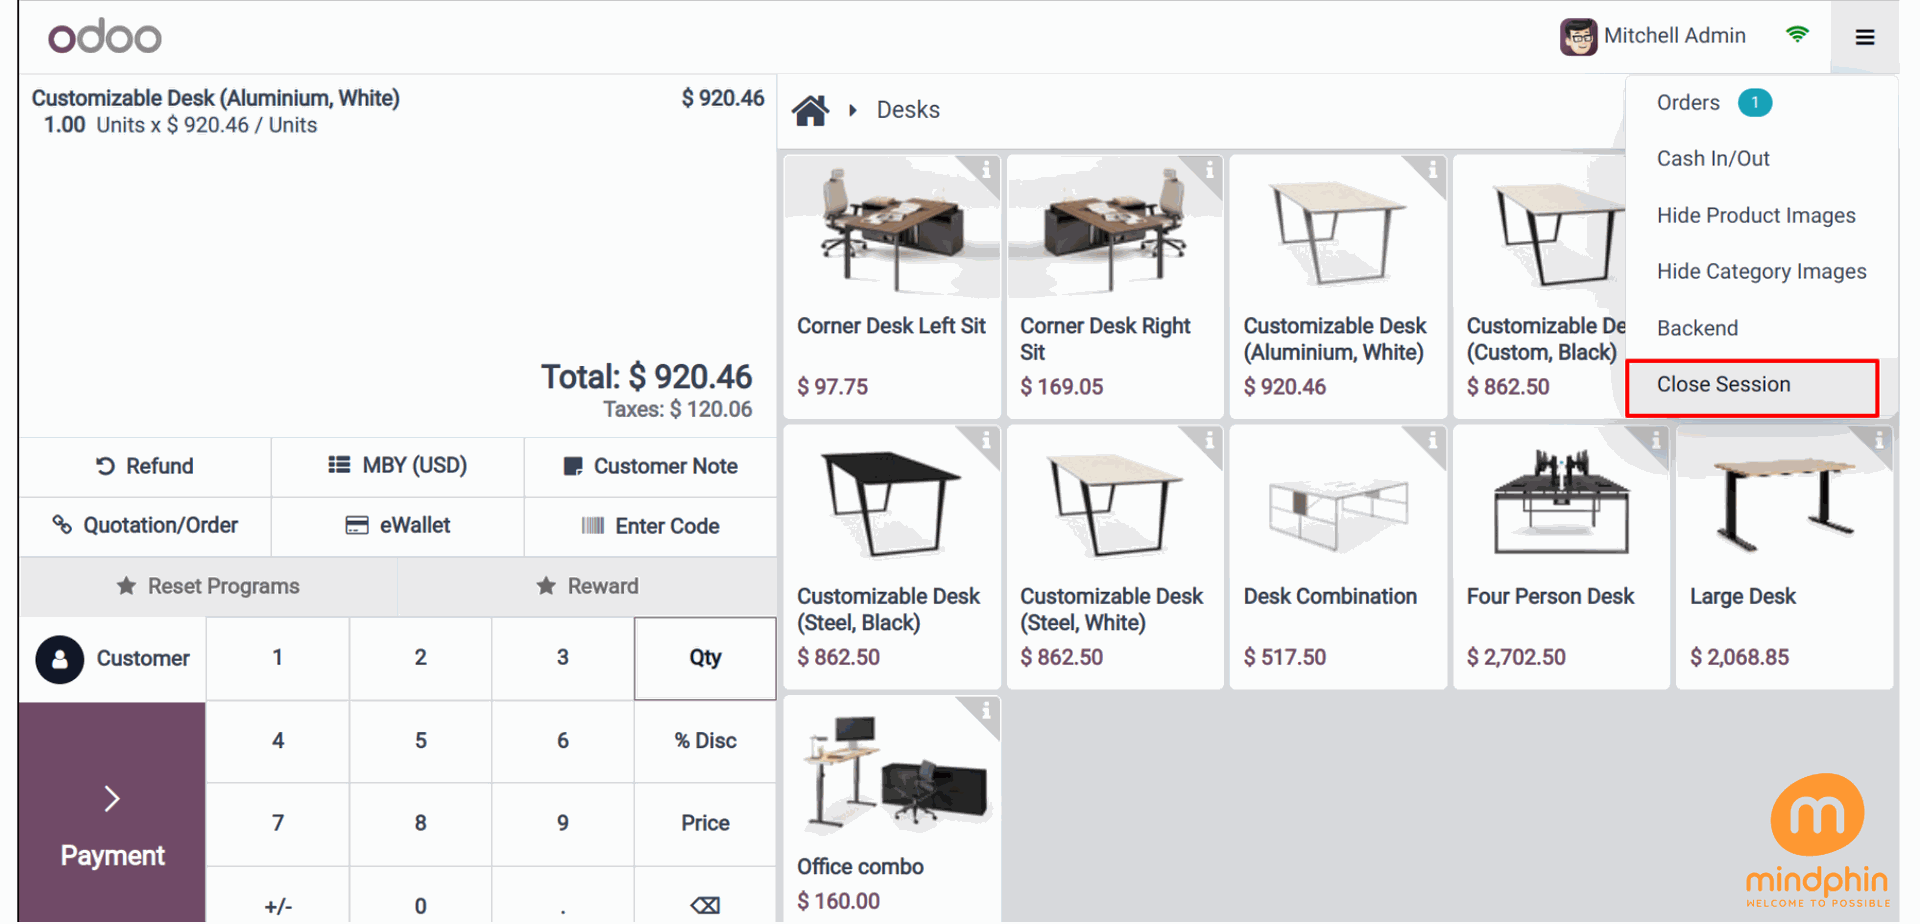
To conclude the transaction and close the session, the user simply needs to click on the 'Close Session' button located in the upper right corner. This leads us to the final section.
At the end of a business day or shift in the Odoo 17 Point of Sale module, the closing balance reflects the total cash or funds left in the cash register after all sales, refunds, and transactions have been accounted for. This figure serves to reconcile the register contents with the expected total, offering a snapshot of the cash situation.
Upon conclusion of the session, a comprehensive report containing details like the total quantity of orders and the number of orders is available. In this session, we have a total of three orders amounting to given bucks. The visual representation below illustrates the starting balance, initial notes, and the cash flow details.
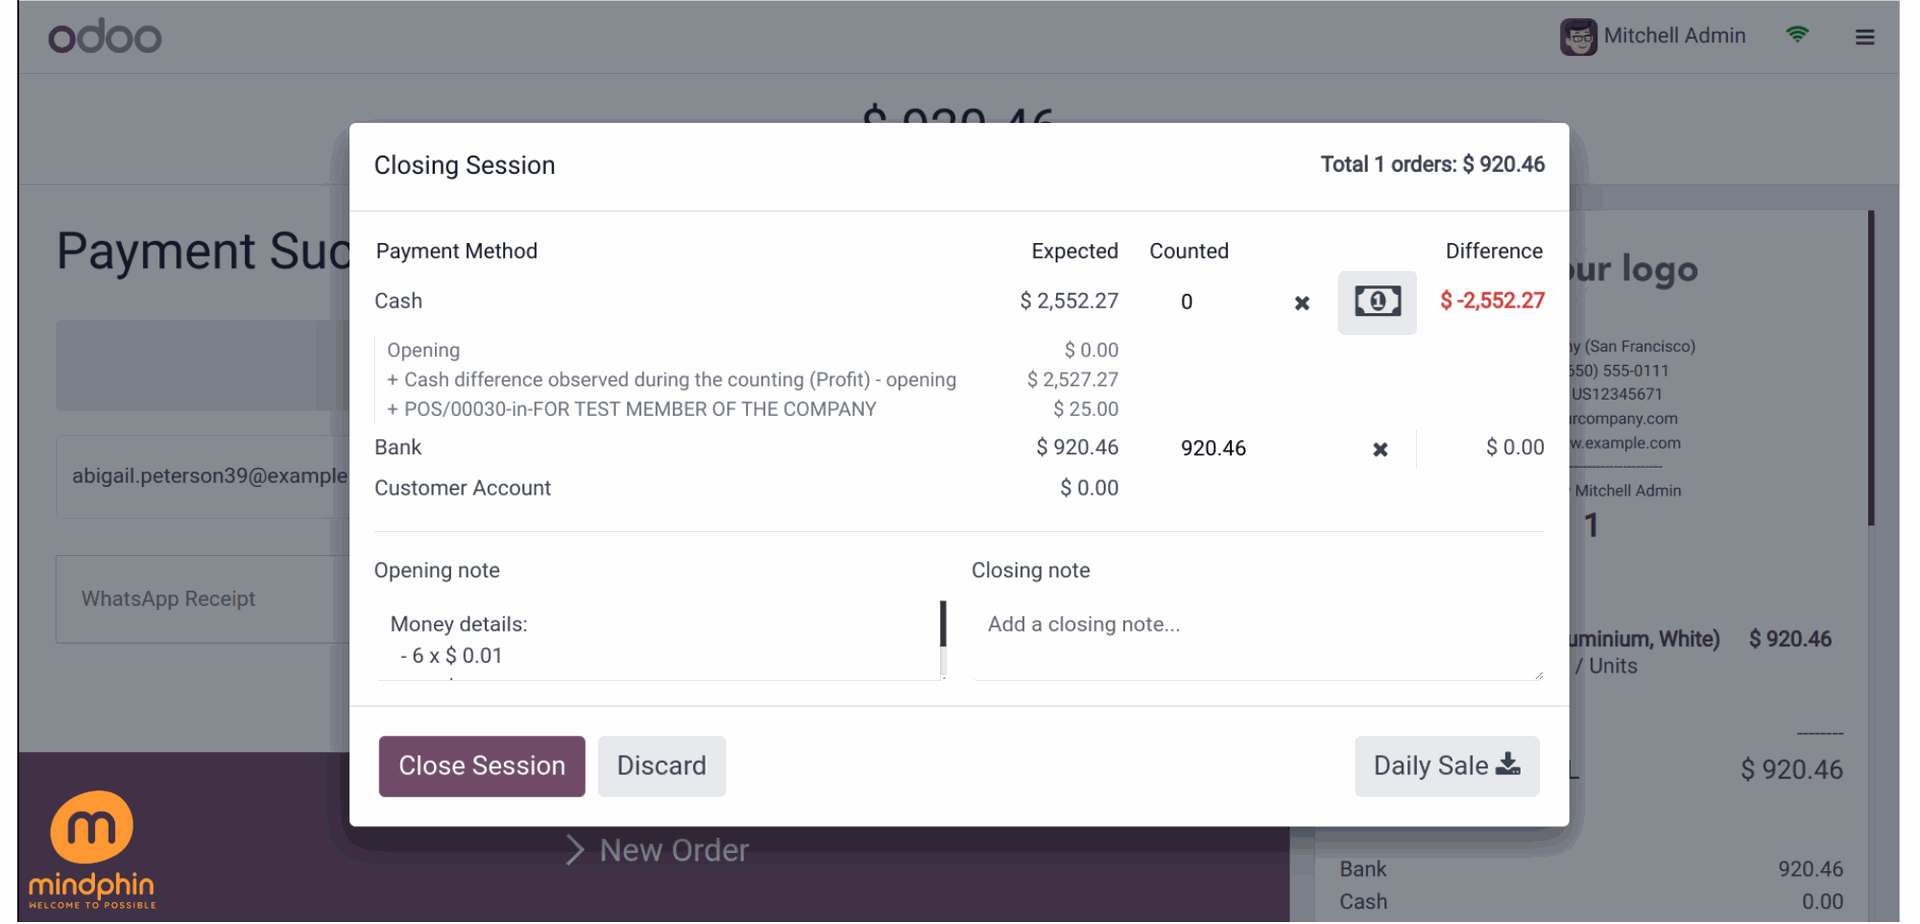
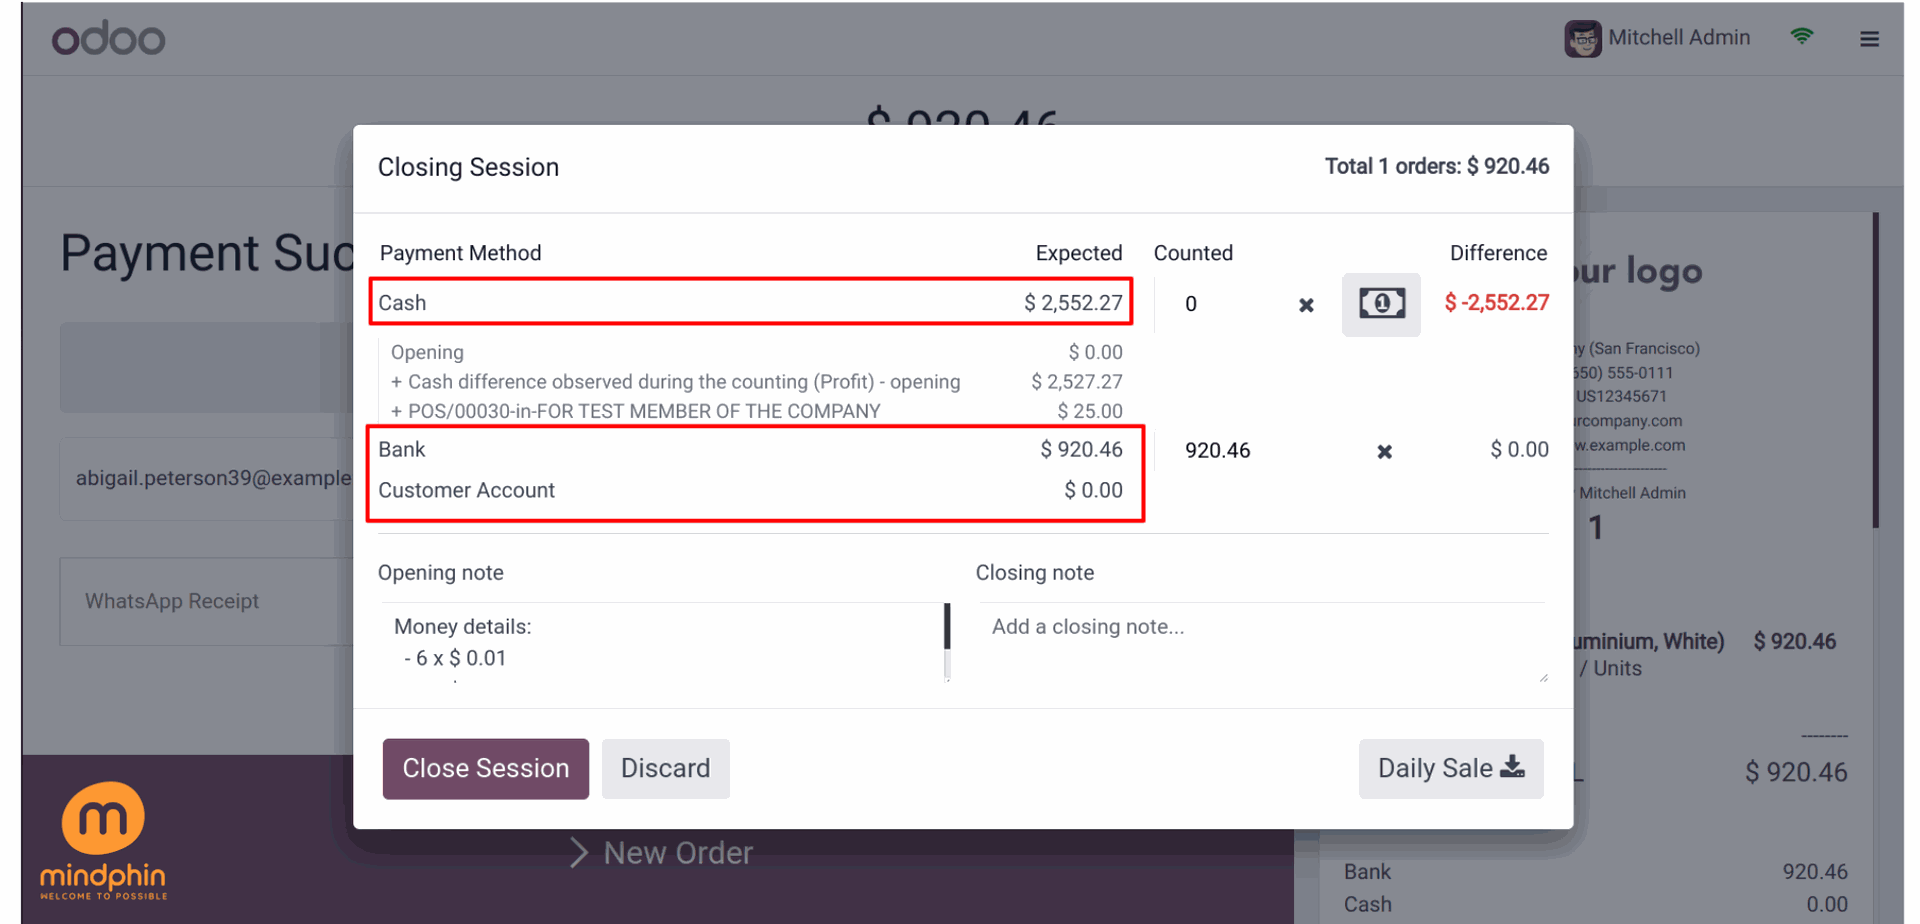
Following the conclusion of the session, the earnings from each payment option will be clearly delineated in the provided screenshot.
During the concluding session, a compact calculator symbol is also showcased. Users have the option to utilize Coins for calculating the Difference. Simply click on it.
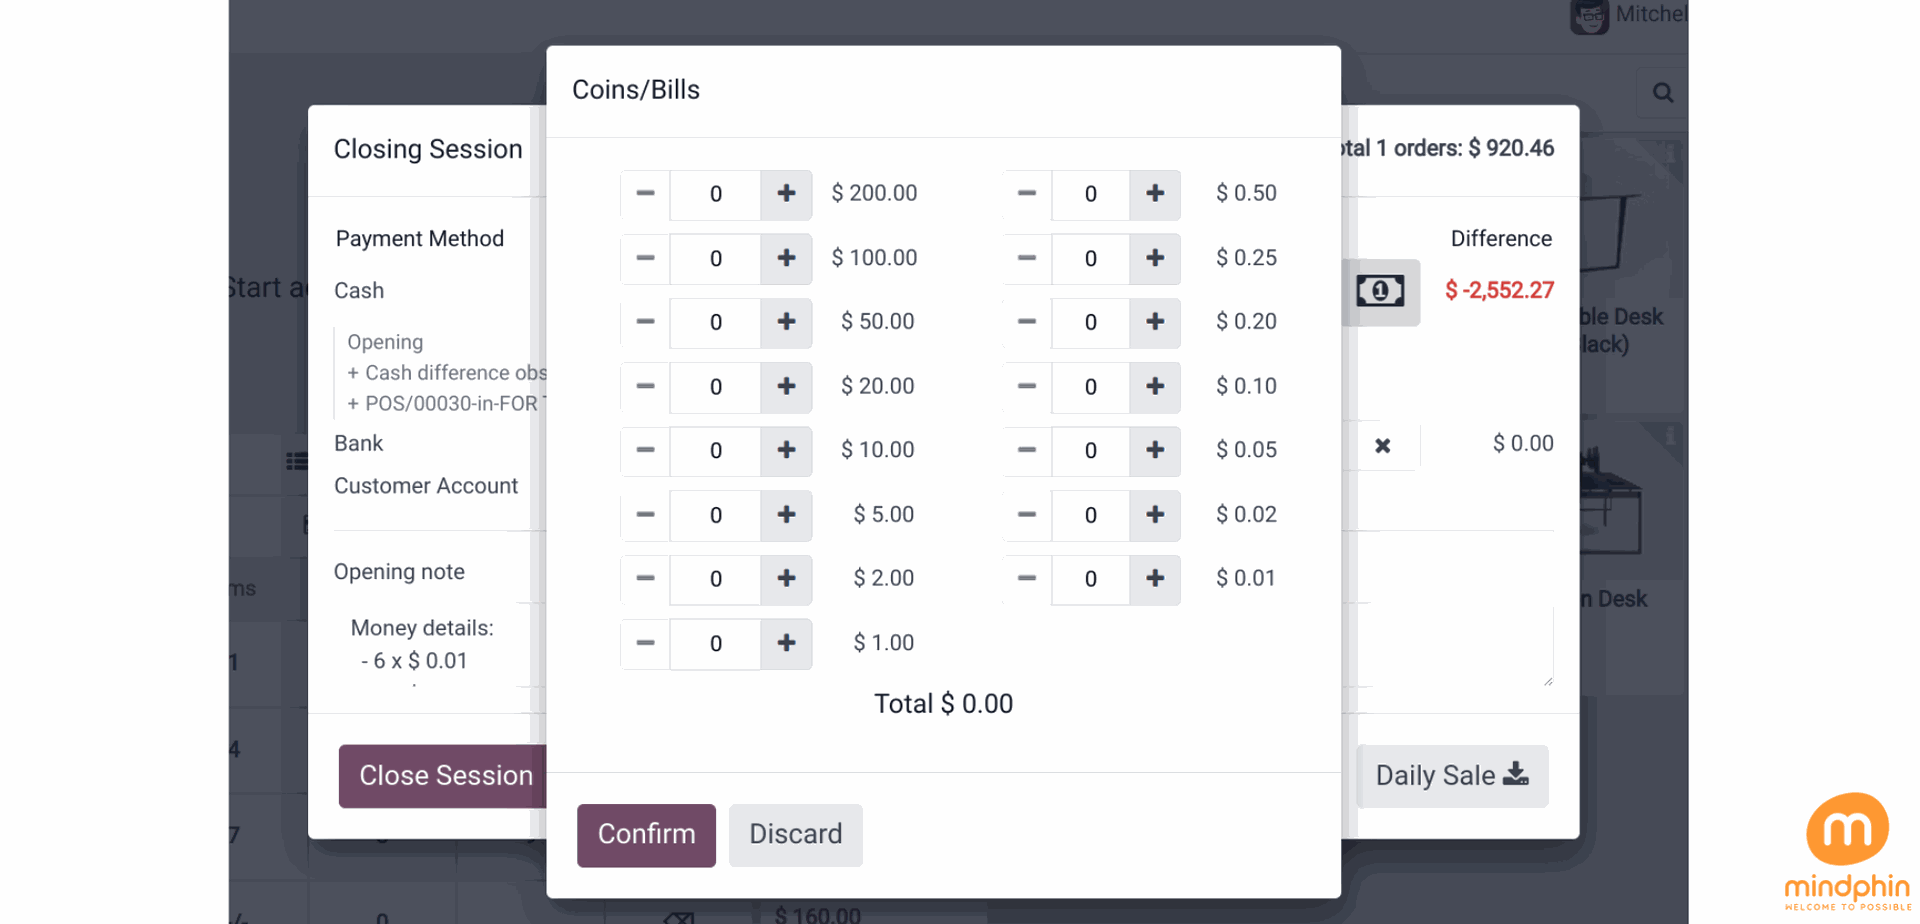
Subsequent to this, the disparity will be updated. The Closing Remarks section will encompass the inclusion of the financial information.
The projected amount is stated, as well as the revised sum of money. This makes it easy to see the difference between the two. Click the 'Close Session button' to wrap up the meeting.
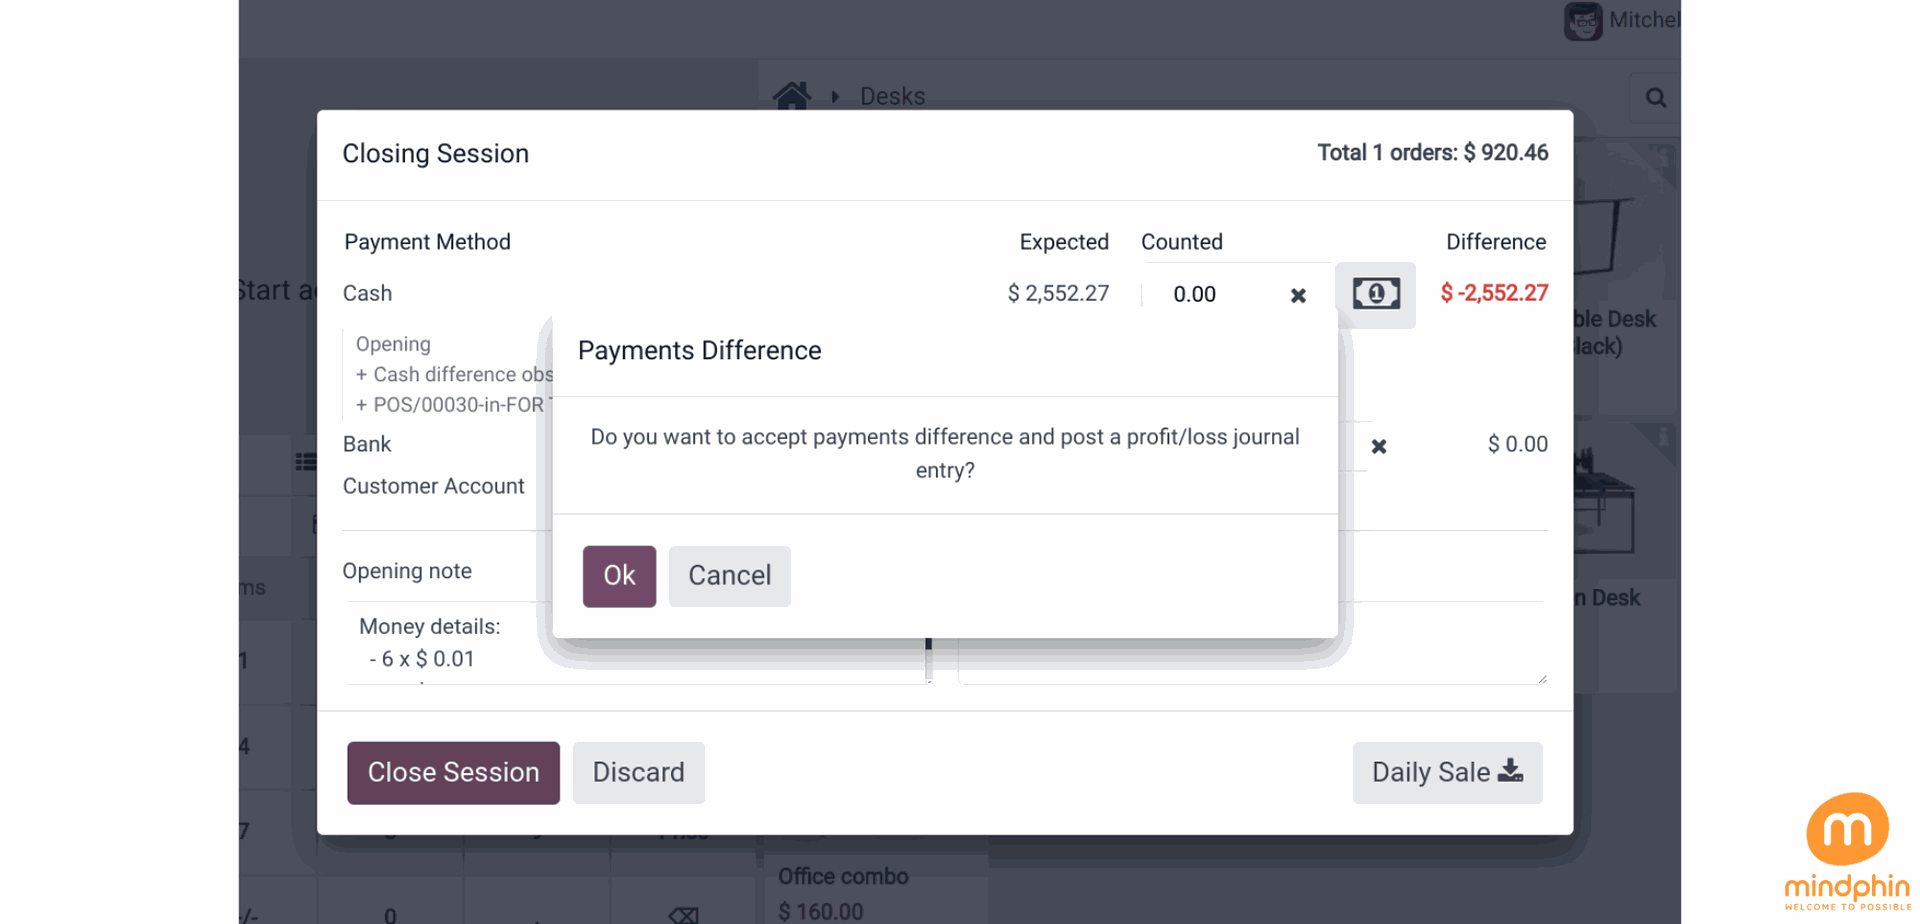
When a payment difference is detected, a popup message will notify the user. Therefore, the journal entry should incorporate the profit and loss. Press 'OK' to proceed. The meeting will then come to a close.
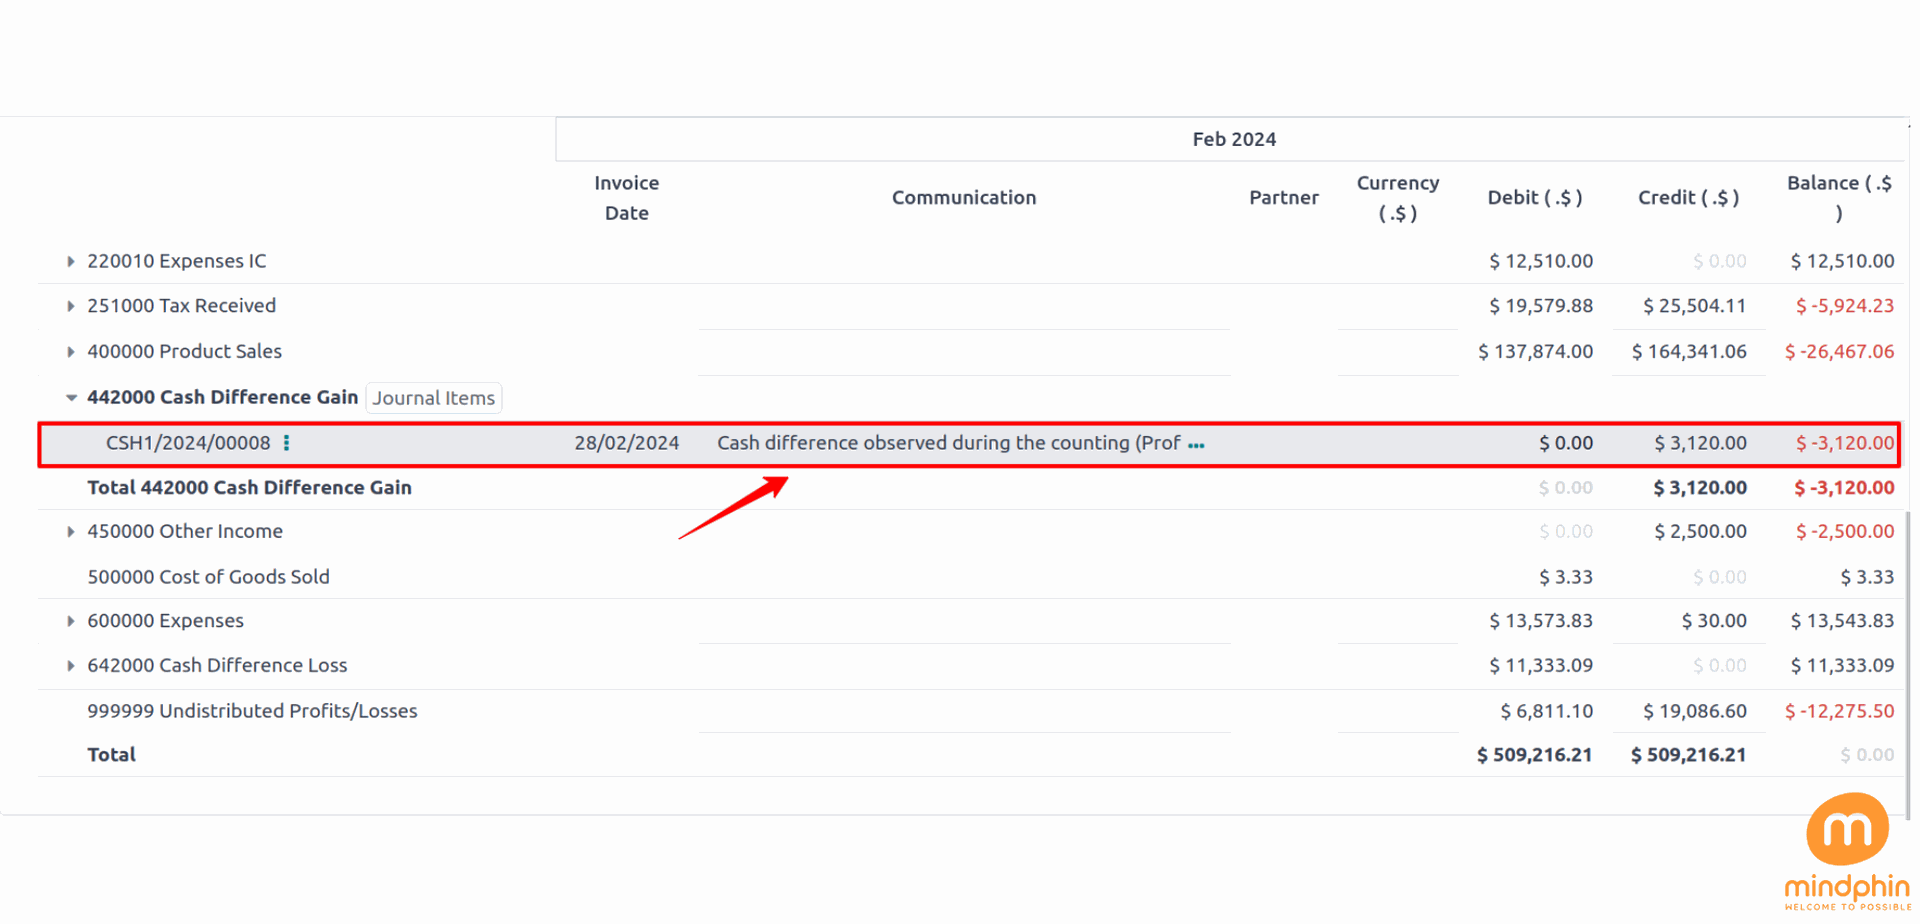
To investigate the journal entry further, let's examine the profit and loss report. Navigate to the Accounting module, access the Reports tab, and select Profit and Loss Report from the drop-down menu.
When the actual amount of funds collected exceeds the projected amount at the conclusion of a session, a 'Cash Difference Gain' is documented in the gain account as supplementary revenue.
If the session ends with the minimum amount, the report will show a loss.
This blog post provides a comprehensive overview of the procedures involved in handling opening and closing cash controls during a Point of Sale session. Key topics covered include Cash In/Out transactions, Cash Discrepancies, Session Closure protocols, Discrepancy Posting guidelines, Initial Balance setup, Denomination Management, Coin Handling in POS, and Maximum Discrepancy limits configuration.